PHP 

Scripts, Resources, Reviews
Tampilkan postingan dengan label Services. Tampilkan semua postingan

Rabu, 01 Agustus 2012

Free Office Software, Kingsoft Office Suite Free 2012

Free Office Software, Kingsoft Office Suite Free 2012


Kingsoft Office Suite Free 2012 (8.1.0.3036) office suite free

Kingsoft Office Suite Free 2012 is a completely free office productivity suite, which includes three programs that reflect the different purposes and tasks required in any working/personal environment. These are:
Writer - fully equipped modern word processor;
Presentation - create effective multimedia presentations;
Spreadsheets - handles all your data processing and analysis requirements.
Kingsoft Office Free is a revolutionary office suite with a small size of only 36.4MB. It is the culmination of 20 years of award winning software engineering experience and is quite stable and reliable.
Although it is a free suite, Kingsoft Office comes with many innovative features, including a paragraph adjustment tool, and multiple tabbed feature. It also hasOffice to PDF converter, automatic spell checking and word count features.

Follow riodarmala on Twitter free counters

Selasa, 24 Juli 2012

HIT CORPORATION ( Fingerprint - Access Control - IP Camera - RFID )

HIT CORPORATION ( Fingerprint - Access Control - IP Camera - RFID )


Tentang HIT CORPORATION ( Fingerprint - Access Control - IP Camera - RFID )

HIT Corporation was founded in 1999 which have business address in Korea and Indonesia, HIT have the business focused in developing, manufacturing, marketing & distributing of Application & Solution of Fingerprint Identification Technology.

Our mission is to become the best Fingerprint Identification Company in the world that can provide the most convenient and reliable solution for our users. The way we accomplish this mission is through continuous investment in R&D, managerial efforts and focus in the line of business.

Continuous development and improvement become our daily feast in creating HIT Corp. to be step a head in innovations. Moreover, the advantageous conditions of our products are derived from our competitiveness in the field of technology, price and differentiations.

Supported by all above aspects, own algorithm and module, continuous and fast R&D, flexibilities, together with providing excellent s

( Open for Dealers )
selo@icon-soltution.com
Follow riodarmala on Twitter free counters

Mesin Absensi Sidik Jari - Mesin Absensi Fingerprint - Akses Kontrol Pintu - CCTV

Mesin Absensi Sidik Jari - Mesin Absensi Fingerprint - Akses Kontrol Pintu - CCTV


Solution X100-C  
Mesin Absensi Sidik Jari yang dirancang khusus dengan Teknologi Terdepan saat ini. Mesin ini memiliki kapasitas memory yang besar dan dilengkapi dengan fitur canggih, seperti: USB Flash Disk, Web Server, Schedule Bell, SMS Message, Workcode, Function Key, dll. Mesin ini juga dilengkapi dengan Layar TFT LCD 3 Inch Full Color yang dapat menampilkan Photo Karyawan. Design Casing Belakang Mesin ini dirancang agar dapat menyembunyikan kabel dan panel belakangnya terbuat dari Besi yang sangat kokoh sehingga membuat mesin ini tampak lebih Rapi, Mewah dan Elegan.
Follow riodarmala on Twitter free counters

Rabu, 06 Juli 2011

Google - Android Market


Google - Android Market


Google + Android

Description
Real-life sharing rethought for mobile.

Google+ (Google Plus) is still in active development and not yet available to everyone. You need an invitation to sign in.

Google+ for mobile makes sharing the right things with the right people a lot simpler. Huddle lets you send super-fast messages to the people you care about most. With your permission, Instant Upload automatically puts the photos and videos you take into a private album in the cloud, so you can share them anytime, from anywhere. And no matter where you are, the stream lets you stay in the loop about what your friends are sharing and where they’re checking in.

Features:
* Circles let you share the right things with just the right people.
* Stream is where you can get updates from your circles or see what people are saying about things nearby.
* Instant Upload automatically uploads videos and photos to your own private album in the cloud, to make sharing a snap.
* Huddle is super-fast group messaging for everyone in your circles.


Follow riodarmala on Twitter
free counters

Rabu, 29 Juni 2011

VGA Convert

9-Pin 15-Pin

Red Video 1 1
Green Video 2 2
Blue Video 3 3
Horizontal Sync 4 13
Vertical Sync 5 14
Red GND 6 6
Green GND 7 7
Blue GND 8 8
Sync GND 9 10 + 11

Blog via Mobile Mail


Follow riodarmala on Twitter
free counters

Senin, 27 Juni 2011

Successful World IPv6


Successful World IPv6 Day Demonstrates Global Readiness for IPv6


Top websites serving billions of users demonstrate progress towards largest transition in Internet’s history

Top websites and Internet service providers around the world, including Facebook, Google, Yahoo, Akamai, and Limelight Networks, joined together with more than 1000 other participating websites in World IPv6 Day for a successful global-scale trial of the new Internet Protocol, IPv6. By providing a coordinated 24-hour “test flight”, the event helped demonstrate that major websites around the world are well-positioned for the move to a global IPv6-enabled Internet, enabling its continued exponential growth.

During World IPv6 Day organized by the Internet Society, nearly 400 participating organizations enabled IPv6 on their main services for 24 hours on 8 June. With IPv4 addresses running out this year, the industry must act quickly to accelerate full IPv6 adoption or risk increased costs and limited functionality online for Internet users everywhere. World IPv6 Day participants came together to help motivate organizations across the industry–Internet service providers, hardware manufacturers, operating system vendors and other web companies–to prepare their services for the transition.

A key goal of World IPv6 Day was to expose potential issues with real-world IPv6 use under controlled conditions. Given the diversity of technology that powers the Internet, the global nature of the trial was crucial to identify unforeseen problems. The vast majority of users were able to access services as usual, but in rare cases, users experienced impaired access to participating websites during the trial.


Follow riodarmala on Twitter
free counters

Acronis The Backup Solution for Everyone


The Backup Solution for Everyone
Have you ever accidentally deleted a file, had a virus corrupt your files, or had a disk fail? These are just a few examples of how people lose pictures, music, personal and financial data every day. Don’t let this happen to you. Protect your PC with Acronis True Image Home 2011, featuring local and available online backup.
PC Backup and Recovery of Systems, Applications and Files
Acronis True Image Home 2011 assures that all your important data, including photos, videos, music, documents and applications, are fully protected and can be recovered quickly in the event of any disaster. Use our intuitive graphical user interface to easily define where you’ll be backing up your PC and how often. Create copies of your hard drive with just a few quick steps while continuing to work. If you lose an important file or need to recover an earlier version of it, don’t worry: you can go back in time to retrieve it in seconds.


Backup

Disk imaging
File backups
Full, incremental and differential backups
Around the clock protection
Manage & Protect

One-click protection
Set & Forget backups
Try&Decide®
Encryption
Privacy tools
Recover

Quick restore
Recover files and folders
Recover to any point in the past
Keep working during a restore


Follow riodarmala on Twitter
free counters

Jumat, 03 Juni 2011

Delete Google Account


Google telah memberikan kita banyak yang bagus webservices termasuk web mail Gmail, Orkut jaringan sosial, sejarah Web Search, Book Search, Adsense, Checkout, dan masih banyak lagi. Saya mengira mereka akan hampir semua user yang tidak akan senang dengan salah satu layanan Web ini.

Jumlah pengguna seperti itu akan sangat sangat kurang dan mereka akan ada yang di ujung dunia ini akan bisa sembuh nya google account atau ingin menutup atau menghapus nya Gmail atau Orkut account. Saya telah melihat banyak pengguna meminta cara menghapus / menutup atau menghapus Google Account, Akun Gmail, Orkut account atau semua layanan Google Web. Baik sebagian besar pengguna tidak menyadari bahwa mereka dapat menghapus atau menghapus salah satu atau semua account google dan webservices seperti Gmail, Orkut etc sebagai link untuk menghapus dan menghapus account google tidak mudah diakses. Hari ini kita akan menunjukkan bagaimana Anda dapat menghapus / menutup atau menghapus Google Account
Cara Hapus / Hapus / Tutup Account Google dan layanan Web seperti Gmail, Orkut

1. Login / Sign in ke Google Account menggunakan http://www.google.com/account

2. Klik link Edit di samping Saya produk kepala.

Google Account Profile Settings

3. Anda akan melihat dua bagian

i. Menghapus Produk: - misalnya Gmail, Orkut, Google Video etc

ii Hapus Account : - Hapus dan Tutup Account Google

Delete Google Accounts
Hapus / Tutup Account Google Webservice

i.
Jika Anda hanya ingin menghapus atau menutup rekening Google Webservice kemudian ikuti Hapus akun masing-masing link di bawah "Menghapus Produk" seksi

ii.
Setelah Anda klik pada link "Hapus Account Secara ..." Halaman konfirmasi akan muncul dengan judul "Harap Baca dengan hati-hati"

iii.
Klik "Ya" untuk mengkonfirmasi dan Hapus Google Account Layanan Web.

Confirm Delete Google Book Account


Setelah Anda klik ya masing-masing layanan Web Google akan dihapus secara permanen
Hapus / Tutup Account Google

i.
Jika Anda ingin Hapus Google Account kemudian ikuti link Tutup account dan menghapus semua layanan dan info yang terkait dengan Bagian dari Hapus Account

ii.
Sebuah halaman dengan judul "Harap hati-hati Baca" Daftar Layanan Google akan muncul.
Delete Google Account

iii.
Anda harus mengkonfirmasi dan mengakui tindakan ini dan setelah anda klik Hapus Account Google Account Google Anda akan mendapatkan Dihentikan secara permanen

Semoga Bermanfaat


Follow riodarmala on Twitter

free counters

SMS: 08568382255 eMail: rio_metacom@yahoo.co.id

Kamis, 26 Mei 2011

Disable all Autorun features in Windows Server 2008 or Windows Vista


How to use Group Policy settings to disable all Autorun features in Windows Server 2008 or Windows Vista
Use either of the following methods:

Method 1

Click Start
the Start button
, type Gpedit.msc in the Start Search box, and then press ENTER.

User Account Control permission
If you are prompted for an administrator password or for confirmation, type the password, or click Allow.
Under Computer Configuration, expand Administrative Templates, expand Windows Components, and then click Autoplay Policies.
In the Details pane, double-click Turn off Autoplay.
Click Enabled, and then select All drives in the Turn off Autoplay box to disable Autorun on all drives.
Restart the computer.

Method 2

Click Start
the Start button
, type Gpedit.msc in the Start Search box, and then press ENTER.

User Account Control permission
If you are prompted for an administrator password or for confirmation, type the password, or click Allow.
Under Computer Configuration, expand Administrative Templates, expand Windows Components, and then click Autoplay Policies.
In the Details pane, double-click Default Behavior for AutoRun.
Click Enabled, and then select Do not execute any autorun commands in the Default Autorun behavior box to disable Autorun on all drives.
Restart the computer.

Back to the top
How to use Group Policy settings to disable all Autorun features in Windows Server 2003, Windows XP Professional, and Windows 2000

Click Start, click Run, type Gpedit.msc in the Open box, and then click OK.
Under Computer Configuration, expand Administrative Templates, and then click System.
In the Settings pane, right-click Turn off Autoplay, and then click Properties.

Note In Windows 2000, the policy setting is named Disable Autoplay.
Click Enabled, and then select All drives in the Turn off Autoplay box to disable Autorun on all drives.
Click OK to close the Turn off Autoplay Properties dialog box.
Restart the computer.

http://support.microsoft.com/kb/967715


Follow riodarmala on Twitter
free counters
SMS: 08568382255 eMail: rio_metacom@yahoo.co.id

Rabu, 25 Mei 2011

Change TCP/IP settings

TCP/IP defines the language that your computer uses to communicate with other computers. We recommend using automated Dynamic Host Configuration Protocol (DHCP) to automatically assign Internet Protocol (IP) addresses to the computers on your network, if your network supports it. If you use DHCP, then you don't have to change your settings if you move your computer to another location, and DHCP doesn't require you to manually configure settings such as Domain Name System (DNS) and Windows Internet Name Service (WINS).

Open Network Connections by clicking the Start button , clicking Control Panel, clicking Network and Internet, clicking Network and Sharing Center, and then clicking Manage network connections.

Right-click the connection that you want to change, and then click Properties. If you are prompted for an administrator password or confirmation, type the password or provide confirmation.

Click the Networking tab. Under This connection uses the following items, click either Internet Protocol Version 4 (TCP/IPv4) or Internet Protocol Version 6 (TCP/IPv6), and then click Properties.

To specify IPv4 IP address settings, do one of the following:

To obtain IP settings automatically, click Obtain an IP address automatically, and then click OK.

To specify an IP address, click Use the following IP address, and then, in the IP address, Subnet mask, and Default gateway boxes, type the IP address settings.

To specify IPv6 IP address settings, do one of the following:

To obtain IP settings automatically, click Obtain an IPv6 address automatically, and then click OK.

To specify an IP address, click Use the following IPv6 address, and then, in the IPv6 address, Subnet prefix length, and Default gateway boxes, type the IP address settings.

To specify DNS server address settings, do one of the following:

To obtain a DNS server address automatically, click Obtain DNS server address automatically, and then click OK.

To specify a DNS server address, click Use the following DNS server addresses, and then, in the Preferred DNS server and Alternate DNS server boxes, type the addresses of the primary and secondary DNS servers.

To change DNS, WINS, and IP settings, click Advanced.

Sumber
Microsoft.com


free counters

SMS: 08568382255 eMail: rio_metacom@yahoo.co.id

Jumat, 20 Mei 2011

Pengertian RAID dan Levels nya

In computing, the acronym RAID (originally redundant array of inexpensive disks, now also known as redundant array of independent disks) refers to a data storage scheme using multiple hard drives to share or replicate data among the drives. Depending on the configuration of the RAID (typically referred to as the RAID level), the benefit of RAID is to increase data integrity, fault-tolerance, throughput or capacity, compared to single drives. In its original implementations, its key advantage was the ability to combine multiple low-cost devices using older technology into an array that offered greater capacity, reliability, speed, or a combination of these things, than was affordably available in a single device using the newest technology. (diartikan sendiri aja yah.. soale pengertian ini aku comot dari wikipedia.org)

Dengan kata lain fungsi RAID adalah penggabungan beberapa harddisk menjadi satu logical unit atau satu volume

Raid Levels
1. RAID O.
Arti : Keseluruhan harddisk yang dimiliki akan berfungsi sebagai tempat penyimpanan data. dengan kata lain data yang kita simpan kedalam harddisk akan di stripping keseluruh harddisk anggota dari RAID 0 tersebut.
Contoh : 4 Harddisk SCSI berkapasistas 72GB per Disk di configure dengan RAID 0 maka total harddisk yang dapat dijadikan penyimpanan data adalah keseluruhannya ( 4 x 72 GB)
Kelebihan : Dengan RAID 0, kapasistas harddisk yang dimiliki untuk penyimpanan data adalah total dari keseluruhan harddisk yang dimiliki, tanpa ada pengurangan
Kekurangan : Jika salah satu harddisk fails dalam RAID 0, maka data akan hilang tanpa ada penggantinya.

2. RAID 1
Arti : Harddisk dalam RAID 1 dapat diartikan sebagai mirroring, karena setengah dari jumlah Harddisk yang diposisikan sebagai RAID 1 digunakan sebagai mirror. Dengan kata lain bahwa hanya setengah dari kapasitas Harddisk keseluruhan yang dapat digunakan sebagai penyimpanan data, setengah lagi hanya berfungsi sebagai mirror
Contoh : 4 Harddisk SCSI berkapasitas 72GB di configure dengan RAID 1, maka hanya 2 Harddisk (2 x 72 GB) yang dapat digunakan sebagai penyimpanan data, dan 2 harddisk lagi (2 x 72GB) lagi digunakan sebagai Mirror dari data tersebut.
Kelebihan : Jika salah satu Harddisk yang berfungsi sebagai penyimpanan data fails/bermasalah, maka harddisk mirror akan secara otomatis menggantikan fungsinya sampai harddisk yang fails tersebut di ganti dengan yang baru, tanpa penurunan performance dari keseluruhan harddisk.
Kekurangan : RAID 1 bisa dikatakan MAHAL, karena hanya setengah dari jumlah harddisk yang dimiliki yang dapat dijadikan tempat penyimpanan data.

3. RAID 1+0
Arti : Harddisk yang di configure dalam RAID 1+0 bisa dikatakan di striping dan di mirror, dengan kata lain data yang kita simpan dalam harddisk akan di stripping ke anggota dari RAID 1+0 tersebut dan juga setengah dari jumlah harddisk yang ada akan di mirror.
Contoh : 4 harddisk SCSI berkapasitas 72GB di configure dengan RAID 1+0 maka kapasitas yang dapat di gunakan untuk penyimpanan data adalah 2 x 72 GB dan data yang disimpan akan di stripping atau dibagikan diantara kedua harddisk tersebut. sisa 2 harddisk lagi berdungsi sebagai mirror.
Kelebihan : bisa dikatakan sama dengan RAID 1 hanya performance dari baca tulis harddisk meningkat dibanding RAID 1
Kekurangan : MAHAL juga seperti RAID 1

4. RAID 5
Arti : Dalam RAID 5 ada pembatasan minimal harddisk yang digunakan, yaitu 4 harddisk, kenapa ? karena dalam sistem RAID 5 ada pembagian data dan parity.
Contoh : 4 harddisk berkapasitas 72GB akan di configure dengan RAID 5, maka 3 x 72 GB akan berfungsi sebagai penyimpanan data dan 1 x 72 GB menjadi parity.
Kelebihan : Jika salah satu dari harddisk tersebut fails, fungsi harddisk masih berfungsi.
Kekurangan : performance akan menurun jika harddisk fails.

5. RAID 6
Arti : Dalam RAID 6 juga ada pembatasan minimal harddisk yaitu 5 harddisk. 3 diantaranya akan di jadikan data dan 2 lagi sebagai parity.
Contoh : 5 harddisk berkapasitas 72GB akan di configure sebagai RAID 6, maka 3 x 72 GB akan berfungsi sebagai penyimpanan data dan 2 x 72GB menjadi parity.
Kelebihan : dalam RAID 6 maksimal harddisk fails dalam waktu yang bersamaan adalah 2 harddisk. jadi jika 2 harddisk didalam RAID 6 fails, fungsi harddisk masih berjalan.
Kekurangan : performance akan menurun jika ada harddisk fails.

END


free counters

SMS: 08568382255 eMail: rio_metacom@yahoo.co.id

Rabu, 18 Mei 2011

Setting Wireless


Setting Wireless Wi-Fi / Wifi Router Link-Sys

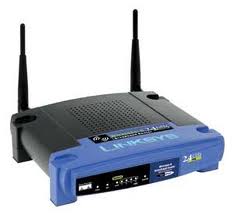
Wi-fi di sini lebih kepada setingan wire-less mengunakan router link-sys. kenapa aq pake linksys karna selain murah, kita bisa dapat router skalian, so klo punya koneksi internet bisa langsung atur di router, tidak harus pake Server segala.

Ketikan di URL Internet Explorer atau Firefox sebagai berikut.
IP:192.168.1.1 Password: admin User:admin

Selanjutnya cari tab router/routing, ganti dengan statik ip trus minta IP provider internet yang di gunakan (TIDAK UNTUK TELKOMNET INSTAN), Nah klo sudah pastikan DHCP server nya di aktifkan, Penting untuk di tambahkan jangan lupa aktifkan securiti-nya ( SSID, WEP dan MAC_ADDRES )


free counters

SMS: 08568382255 eMail: rio_metacom@yahoo.co.id

Rabu, 20 April 2011

Active Directory Windows Server 2008

free counters

Active Directory Windows Server 2008
Downloads PDF disini

Active Directory provides the means to manage the identities and relationships that make up your organization's network. Integrated with Windows Server 2008 R2, Active Directory gives you out-of-the-box functionality needed to centrally configure and administer system, user, and application settings.

Active Directory Domain Services

Active Directory Domain Services (AD DS), formerly known as Active Directory Directory Services, is the central location for configuration information, authentication requests, and information about all of the objects that are stored within your forest. Using Active Directory, you can efficiently manage users, computers, groups, printers, applications, and other directory-enabled objects from one secure, centralized location.


Active Directory Rights Management Services

Your organization’s intellectual property needs to be safe and highly secure. Active Directory Rights Management Services, a component of Windows Server 2008, is available to help make sure that only those individuals who need to view a file can do so. AD RMS can protect a file by identifying the rights that a user has to the file. Rights can be configured to allow a user to open, modify, print, forward, or take other actions with the rights-managed information. With AD RMS, you can now safeguard data when it is distributed outside of your network.


Active Directory Federation Services

Active Directory Federation Services is a highly secure, highly extensible, and Internet-scalable identity access solution that allows organizations to authenticate users from partner organizations. Using AD FS in Windows Server 2008, you can simply and very securely grant external users access to your organization’s domain resources. AD FS can also simplify integration between untrusted resources and domain resources within your own organization.

Active Directory Certificate Services

Most organizations use certificates to prove the identity of users or computers, as well as to encrypt data during transmission across unsecured network connections. Active Directory Certificate Services (AD CS) enhances security by binding the identity of a person, device, or service to their own private key. Storing the certificate and private key within Active Directory helps securely protect the identity, and Active Directory becomes the centralized location for retrieving the appropriate information when an application places a request.

Active Directory Lightweight Directory Services

Active Directory Lightweight Directory Service (AD LDS), formerly known as Active Directory Application Mode, can be used to provide directory services for directory-enabled applications. Instead of using your organization’s AD DS database to store the directory-enabled application data, AD LDS can be used to store the data. AD LDS can be used in conjunction with AD DS so that you can have a central location for security accounts (AD DS) and another location to support the application configuration and directory data (AD LDS). Using AD LDS, you can reduce the overhead associated with Active Directory replication, you do not have to extend the Active Directory schema to support the application, and you can partition the directory structure so that the AD LDS service is only deployed to the servers that need to support the directory-enabled application.

Additional Active Directory Improvements

The Active Directory Installation Wizard includes several improvements over earlier versions. These improvements make it easier for an administrator to control the installation of domain controllers within the domain. Enhancements include:

New Forest Functional Level. Windows Server 2008 R2 includes a new Active Directory forest functional level. Many of the new features in the Active Directory server roles require the Active Directory forest to be configured with this new functional level.Enhanced Command Line and Automated Management. Windows PowerShell cmdlets provide the ability to fully manage Active Directory server roles.

Improved Automated Monitoring and Notification. An updated System Center Manager 2007 Management Pack helps improve the monitoring and management of Active Directory server roles.

Better Management with Server Manager. Server Manager, the Windows Server 2008 R2 server management tool, allows an administrator to pre-stage domain controllers. When the domain controller role is added from the Server Manager console, the files that are needed to perform the installation of the directory service are copied to the server. When an administrator starts the Installation Wizard, dcpromo.exe, the files are already cached and available.

Improved Compliance with Established Standards and Best Practices. Windows Server 2008 R2 includes an integrated Best Practices Analyzer for each of the server roles. The Best Practices Analyzer creates a checklist within Server Manager for the role, which you can use to help perform all the configuration tasks.

Installation Microsoft Windows 7

free counters


Installation Microsoft Windows 7

Microsoft Windows 7 telah diluncurkan ke pasaran, dan banyak mendapat respon positif, pujian dengan fitur-fitur yang ditawarkan. Microsoft mengclaim ini adalah sistem operasi Windows yang terbaik yang pernah dibuat.

Berikut beberapa tips dan trik yang bermanfaat seputar Windows 7.

(TIPS 1)
BAGAIMANA MENGINSTAL WINDOWS 7 (dengan custom installation)
Tutorial berikut menjelaskan langkah instalasi Windows 7. Apabila anda masih menggunakan Windows XP, maka pilih Windows 7 Custom Installation dan jangan menggunakan pilihan Upgrade. Pilihan upgrade hanya digunakan apabila anda telah menginstall Windows 7 sebelumya (versi Windows 7 Beta atau Windows 7 RC).
Langkah-langkah install Windows 7:
Pilih diatara 32-bit atau 64-bit Windows 7 cd instalasi, tergantung keputusan anda untuk menginstall 32bit/64bit Windows 7 di PC anda.
Jalankan program anti-virus untuk membersihkan virus. Kemudian matikan program anti-virus. (Langkah ini hanya bersifat pilihan/optional, anda dapat mengabaikannya apabila merasa tidak perlu).
Siapkan 25 karakter Windows Product Key. Dapat dilihat pada kemasan CD instalasi atau melalui email konfirmasi apabila membeli atau mendownload Windows 7 secara online.

Berikut langkah instalasi Windows 7 :
Nyalakan komputer dan booting ke Windows XP. Aktifkan koneksi internet pada PC untuk mendownload update selama proses instalasi.
Masukkan DVD installer Windwos 7 pada DVD ROM, maka Windows 7 setup akan langsung aktif. Apabila tidak, klik pada Start - My Computer dan buka DVD drive Windows 7 instalasi, kemudian dobel-klik file setup.exe. Apabila anda tidak memiliki Windows instalasi disk, karena membeli secara online, maka buka instalasi file-nya.
Pada halaman Install Windows, klik Install now
Pada halaman Get important update for installation, pastikan bahwa anda mendapat update terbaru untuk membantu lancarnya instalasi. Anda perlu tersambung dengan internet untuk mendownload update, tetapi apabila tidak ada internet pun masih dapat menginstall dengan baik, meskipun update online sangat disarankan.
Pada halaman Please read the license terms, baca dan setujui/accept license terms dan klik Next.
Pada halaman Which type of installation do you want?, klik Custom.
Pilih partisi/partition berisi Windows XP (kebanyakan menggunakan Drive C:) dan kemudian klik Next. Pastikan tidak memilih external USB hard drive.
Pada dialog boc Windows.old, klik OK dan lanjutkan mengikuti instruksi untuk menyelesaikan instalasi Windows 7, termasuk menamai komputer dan mensetting inisial akun pengguna (initial user account). Catatan: anda dapat menggunakan nama yang sama dengan nama yang anda gunakan pada Windows XP, atau memilih nama baru.
selamat menikmati fitur Windows 7.

(TIPS 2)
RESTORE/MENGEMBALIKAN KE POSISI SEMULA FILE-FILE DAN SETTING/PENGATURAN DI WINDOWS 7
Apabila anda ingin melakukan restore file komputer dan setting di Windows 7 setelah upgrade dari Windows XP atau Windows Vista, maka gunakan Windows Easy Transfer dan ikuti langkah-langkah dibawah ini. Tetapi dengan catatan bahwa sebelum melakukan hal ini, anda terlebih dahulu telah melakukan proses Transfer Komputer File dan setting dari Windows XP atau Vista, menggunakan Windows Easy Transfer.

Bagaimana me-restore file dan setting di Windows 7 setelah melakukan upgrade XP atau Vista ?
Perlu dicatat juga bahwa langkah restore file dan setting juga dapat dilakukan di Windows XP menggunakan Windows Easy Transfer.
Pertama sambungkan external hardisk anda atau media penyimpan data lainnya yang berisi Windows Easy Transfer migration file, ke komputer anda.
Jalankan Windows Easy Transfer, untuk me-restore file dan program-program dimana seharusnya berada.
Browse pada lokasi di External Hard Drive, dimana anda menyimpan Easy Transfer file yang disebut Windows Easy Transfer (atau nama lain sesuai dengan nama yang anda berikan) dan dobel klik pada file tersebut
Masukkan kata sandi/password apabila Easy Transfer file dilindungi oleh password, kemudian klik Next.
Pada halaman Choose what to transfer to this computer, anda bisa tentukan bagaimana user account yang berasal dari Windows XP anda akan ditransfer ke Windows 7.
Untuk akun mapping, klik Transfer.
Untuk mengubah mapping Windows XP akun di Windows 7, klik Advanced Options.
Pada halaman Your transfer is complete, klik See what was transferred untuk melihat list user dan file-file yang telah dipindahkan dari Windows XP ke Windows 7. Klik See a list of programs you might want to install on your new computer untuk melihat apa saja yang sebelumnya telah terinstall di Windows XP.
Klik Close. Apabila diminta untuk merestart komputer, klik Restart now.

Apabila mentransfer lebih dari satu user account, anda akan mendapat peringatan untuk mengubah password di lain waktu anda log on. Apabila mendapat peringatan tersebut, klik OK, dan pada dialog box yang muncul, lakukan hal berikut:
Apabila ingin memberikan password bagi user (direkomendasikan), ketik password baru, ketik ulang, dan tekan Enter. Tidak perlu mengetikkan password lama dari Windows XP. Apabila anda tidak ingin menggunakan password, biarkan kotak pengisian kosong dan tekan Enter

(TIPS 3)
BAGAIMANA MENGUPGRADE DARI WINDOWS VISTA KE WINDOWS 7
Anda mungkin telah memiliki sistem operasi Windows Vista, dan ingin mengupgradenya ke Windows 7, dengan CD Master Original Windows 7 dan jalankan proses installation pilih Upgrade, tunggu sampai Finish.

(TIPS 4)
BUKU PETUNJUK WINDOWS 7 (Windows 7 Guide Book)
Sekarang anda dapat mendownload buku petunjuk Windows 7 langsung dari server Microsoft.

Petunjuk mengenai Windows 7 ini dapat dibaca dan dimengerti oleh setiap pengguna komputer karena Microsoft menghindari istilah-istilah yang teknis dalam bahasannya. Petunjuk membahas secara detail tentang fitur-fitur baru dan penyempurnaan di Windows 7. Petunjuk ini didesain untuk membantu setiap pengguna PC dapat mengerti bagaimana Windows 7 mempermudah kita dalam menyelesaikan tugas harian, berfungsi sesuai dengan keinginan anda, dan membuat hal-hal baru dapat menjadi kenyataan.

Ada 3 bagian utama dari petunjuk Windows 7 :
Introduction/pembukaan - menjelaskanbagaimana Microsoft mendesain Windows 7, apa saja edisi Windows 7 yang tersedia dan apa yang baru.
Windows 7 for You - Bagian ini menuju pada fitur di Windows 7 yang membuat pengerjaan tugas-tugas lebih mudah dan sederhana, bekerja seperti keinginan anda, dan membuat hal-hal baru menjadi kenyataaan.
Windows 7 for IT Professional - ini ditujukan untuk profesional di bidang IT komputer yang menjelaskan bagaimana Windows 7 dapat membuat seseorang produktif dimanapun berada, memanajemen resiko dengan keamanan dan kontrol yang baik, dan mengurangi biaya dengan PC management, bagian ini juga memperkenalkan Microsoft Desktop Optimization Pack untuk membantu anda mempelajari bagaimana set aplikasi dapat membantu anda memanajemen dan mengoptimalkan desktop

Download Windows 7 Product Guide

Microsoft Windows 7 product guide tersedia dalam format XPS dan PDF . XPS besarnya 30.5Mb dan PDF besarnya 62Mb. Untuk melihat dokumen XPS, perlu menginstall software pembaca(sudah ada di dalam Windows 7 dan Windows Vista) dan untuk melihat dokumen PDF, gunakan Adobe Acrobat Reader.

Minggu, 17 April 2011

Virus Sality

free counters


Virus Sality,
Sampai sekarang virus yang paling merepotkan. Tidak semua program antivirus dapat membersihkan file yang sudah terinfeksi virus W32/Sality.AE. Malah bisa-bisa, file tersebut akan rusak setelah di-scan dan dibersihkan oleh antivirus yang tidak tepat.

Virus Sality akan menyebar dengan cepat melalui jaringan dengan memanfaatkan default share Windows atau share folder yang mempunyai akses full dengan cara menginfeksi file yang mempunyai ekstensi exe/com/scr.

Untuk itu, perusahaan sekuriti Vaksincom menyarankan pengguna komputer untuk menonaktifkan Default Share (C$, D$ .. dst) dan hindari full sharing folder Anda di jaringan.

Berikut 9 cara singkat membersihkan virus W32/Sality.AE

1. Putuskan hubungan komputer yang akan dibersihkan dari jaringan dan internet.

2. Matikan System Restore selama proses pembersihan berlangsung.

3. Matikan Autorun dan Default Share.

4. Matikan program aplikasi yang aktif di memori agar proses pembersihan lebih cepat terutama program yang ada dalam daftar startup.

5. Sebaiknya scan dengan menggunakan removal tools dengan terlebih dahulu merubah ekstensi dari removal tools tersebut dengan ekstensi lain [contoh: CMD] agar tidak diinfeksi ulang oleh W32/Sality.AE.

6. Agar komputer yang sudah terinfeksi W32/Sality.AE dapat booting safe mode, silahkan restore registry yang sudah diubah oleh virus.

7. Fix registry lain yang diubah oleh virus

8. Restart komputer dan scan ulang dengan menggunakan removal tools untuk memastikan komputer telah bersih dari virus.

9. Untuk pembersihan optimal dan mencegah infeksi ulang sebaiknya install dan scan dengan antivirus yang dapat mendeteksi Sality dengan baik.

Gunakan;
Avira Anti Virus free atau yang Powerfull dengan berbayar.

Download disini

SERVICE ONLINE

Area, Jakarta Raya
Lebih di Utamakan, Wilayah Jakarta Timur
Sdr. Rio
Specialist IT dan Consulting
Customer bisa melakukan SMS , Call, FB Inbox dan eMail ke di bawah ini, sesuai dengan keluhan dan Area, berikan alamat yang valid serta nama dan menyetujui aturan yang berlaku.
Pelayanan Pekerjaan Hari:
Sabtu / Minggu atau
di sesuaikan dengan perjanjian
Melayani Jasa Services dan Maintenance:
Installasi Server All Varian Brand, Manage and Deploy Server, Manage and Join Domain Client Server, Installasi OS plus Device Ready, Installasi Office Aplication, Installasi Office Multimedia, Installasi Modem ADSL dan Cable, Setting Network Internet dan Intranet, Backup and Restore Data Office, Clean Viruses, Trouble Shooting, Check Hardware Problem, Check Upgrade System, dll.

 
Design by Wordpress Theme | Bloggerized by Free Blogger Templates | coupon codes